
How to Keep Your Blade Corrosion-Free?
Rust is one of the biggest enemies of knives. Whether you own a professional chef’s knife, a pocket knife, or a high-carbon steel blade, corrosion can shorten its lifespan and ruin its performance. Understanding why knives rust and how to prevent corrosion is essential for keeping your blade sharp, safe, and long-lasting.
In this guide, we’ll explore the causes of rust on knives and proven knife rust prevention tips to help you maintain a corrosion-free blade.
What Is Rust and Why Does It Affect Knives?
Rust is a form of corrosion that occurs when iron reacts with oxygen and moisture. Since most knives are made from steel (which contains iron), they are naturally prone to rust—especially if not cared for properly.
Even stainless steel knives can rust under certain conditions, despite their corrosion-resistant properties.
SEO Keywords used: rust on knives, knife corrosion, steel knife rust
Common Causes of Rust on Knives
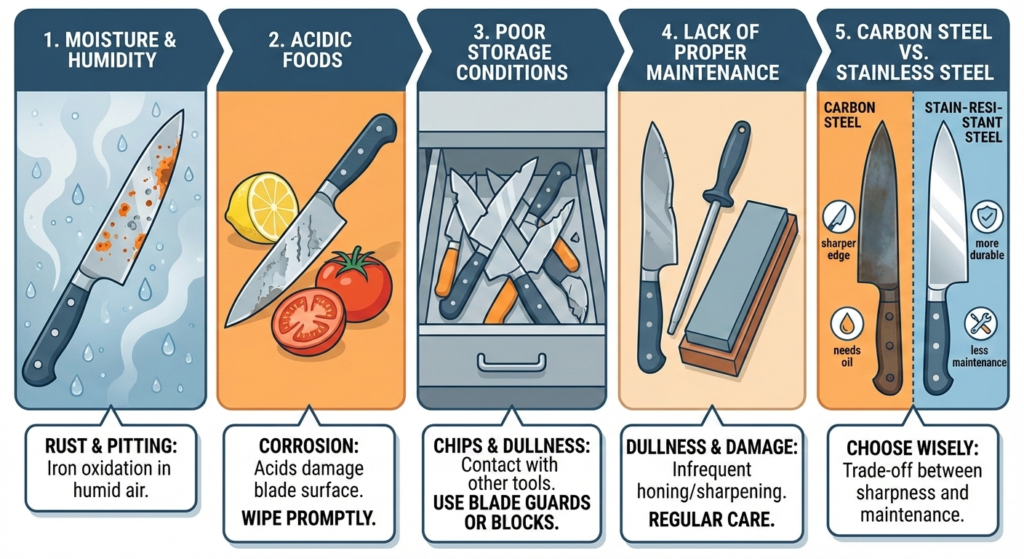
1. Moisture and Humidity
Leaving your knife wet after washing or storing it in a humid environment is the most common cause of rust. Water speeds up the oxidation process.
Tip: Always dry your knife completely after washing and never leave it wet or air-drying.
2. Acidic Foods
Cutting acidic foods like lemons, tomatoes, or vinegar-rich items can damage the blade’s protective layer—especially on carbon steel knives.
Tip: Rinse and wipe your knife immediately after cutting acidic foods like lemons or tomatoes.
3. Poor Storage Conditions
Storing knives in damp drawers, leather sheaths, or unventilated knife rolls can trap moisture and promote corrosion.
Tip: Store knives in a dry, well-ventilated place using blade guards, knife blocks, or magnetic strips.
4. Lack of Proper Maintenance
Not cleaning, oiling, or sharpening your knife regularly can leave it vulnerable to rust and pitting.
Tip: Clean, oil, and inspect your knife regularly to stop rust before it starts.
5. Carbon Steel vs Stainless Steel
Carbon steel knives rust faster than stainless steel because they lack chromium, which helps resist corrosion.
Tip: Carbon steel knives need frequent drying and light oiling, while stainless steel still needs basic care.
How to Remove Rust from a Knife Safely and Effectively
Rust on a knife doesn’t mean the blade is ruined. In most cases, surface rust can be removed easily at home using simple tools. The key is to act early and use the right rust removal method without damaging the blade’s finish or edge.
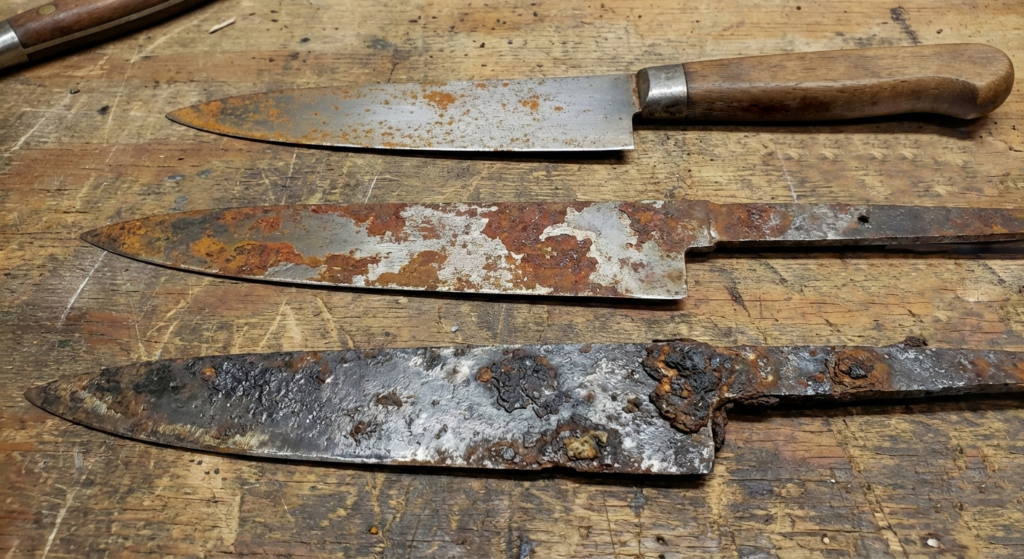
Identify the Type of Rust on Your Knife
Before removing rust, it’s important to understand how deep it is.
Light Surface Rust
This appears as orange or brown spots on the blade and is the easiest to remove.
Moderate Rust
The rust is more visible and slightly rough to the touch but hasn’t deeply pitted the steel.
Deep Rust or Pitting
Dark, rough areas that have eaten into the metal. This may require professional sharpening or restoration.
Tools You Can Use to Remove Rust from a Knife
Most rust removal can be done with common household items:
Baking soda
White vinegar
Lemon juice
Soft sponge or cloth
Cork or soft toothbrush
Food-safe mineral oil
Camellia oil
Whetstone
Tsubaki oil
Method 1: for Light Rust
The Baking Soda “Film” (Safest for All Steels)
Baking soda is a mild base that neutralizes surface acidity and provides just enough grit to lift rust without scratching a mirror-polished finish.
Clean the Knife: Wash the blade with dish soap to remove any oils or food residue.
Make a Thin Paste: Mix 3 parts baking soda with 1 part water. It should be thinner than the paste used for stubborn rust—more like a thick glaze.
The Application: Spread the paste over the orange spots. You don’t need to let it sit for hours; 5–10 minutes is enough.
The Wipe: Use a soft cloth or a wine cork to rub the paste in the direction of the steel’s grain. The orange stains should lift onto the cloth.
Rinse & Dry: Wash with water and dry immediately with a paper towel.
The Potato Trick (The “Chef’s Secret”)
Potatoes contain oxalic acid, a natural compound used in many commercial rust removers. This is the best method if you are worried about using any abrasives on a high-end knife.
The Cut: Slice a raw potato in half.
The Booster: Dip the cut end into a bit of dish soap or baking soda (this acts as a lubricant and a very mild abrasive).
The Rub: Rub the potato directly onto the rust spots. The combination of the oxalic acid and the starch will dissolve the light oxidation.
The “Soak”: For slightly more persistent light rust, you can actually stick the knife blade into a whole potato and leave it for 20 minutes.
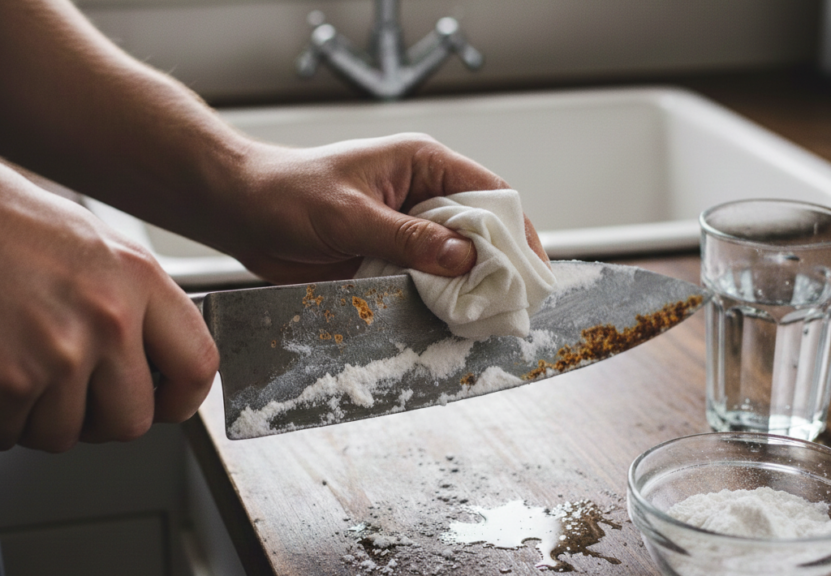
Lemon and Salt (The “Quick Fix”)
The citric acid in lemons acts as a natural bleach and solvent for iron oxide.
The Salt Barrier: Sprinkle a thin layer of fine table salt over the rust spots.
The Juice: Squeeze fresh lemon juice over the salt.
The Wait: Let it sit for no more than 5 minutes (acid can dull the edge if left too long).
The Scrub: Use the discarded lemon rind to scrub the salt against the blade, then rinse thoroughly.
Avoid:
Steel wool, power tools, or harsh abrasives—they can permanently scratch the blade.
Method 2 For Moderate Rust
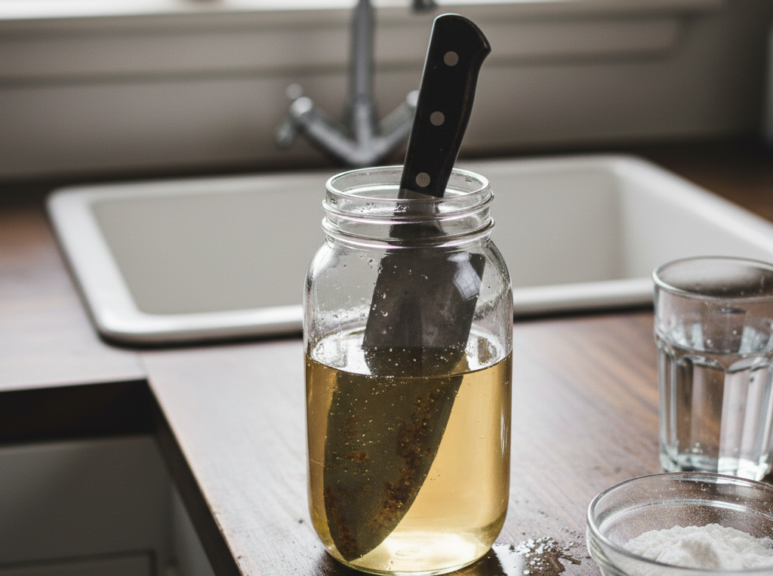
1. The Vinegar “Softening” Soak
Because moderate rust has some thickness to it, you need to soften the bond between the rust and the steel first.
The Soak: Submerge the blade in white vinegar for 15 minutes.
The Reaction: You will see the vinegar start to turn a murky yellow or orange as the acetic acid begins to dissolve the iron oxide.
The Wipe: Pull the knife out and wipe it with a paper towel. A layer of “sludge” should come off, leaving the tougher rust patches behind.
2. The “Medium” Scrub (The Cork Method)
Now that the rust is softened, you need an abrasive that is firm enough to scrub, but soft enough not to ruin the knife’s finish.
The Tool: Use a Wine Cork. Its natural texture is the perfect “medium” abrasive.
The Process: Dip the end of the cork into baking soda or a powdered cleanser (like Bar Keepers Friend).
The Action: Scrub the moderate rust patches in a back-and-forth motion. The cork holds the abrasive powder against the steel and provides enough pressure to “shave” off the rust.
3. The “Rust Eraser” (The Upgrade)
If the cork isn’t enough, use a Sabitoru (Rust Eraser) in “Medium” grit.
Wet the eraser with water.
Rub it over the rust patches just like you are erasing a pencil mark. This is the gold standard for moderate rust because it physically pulls the oxidation out of the surface grain.
Step 4: The Recovery (Critical)
After removing moderate rust, the steel is “raw” and highly prone to flash rusting (rusting again within minutes).
Neutralize: Rinse the knife thoroughly in a mixture of water and baking soda to stop the vinegar’s acid from continuing to eat the metal.
Thermal Dry: Wipe it with a towel, then use a hair dryer or the heat from a stove (carefully) to ensure every microscopic bit of moisture is gone.
Oil Seal: Immediately apply a thin coat of food-grade mineral oil.
⚠️ Caution: Do not soak for too long—acid can damage the steel.
Tip: Use acidic solutions briefly and always rinse and oil immediately afterward.
Method 3: For Deep Rust or Pitting
Phase 1: The Chemical “Deep Soak”
Pits trap rust deep inside. You must first dissolve the oxidation that brushes and sponges cannot reach.
Submerge in White Vinegar: Fill a tall glass with white vinegar and submerge the blade.
Time: Let it soak for 12–24 hours. You will see the vinegar turn dark and bubbles form around the pits.
Neutralize (Critical): Acid stays trapped in the pits and will cause the knife to re-rust immediately if not neutralized.
Mix 2 tablespoons of baking soda in water.
Submerge the knife in this alkaline solution for 10 minutes after the vinegar soak to “kill” the acid.
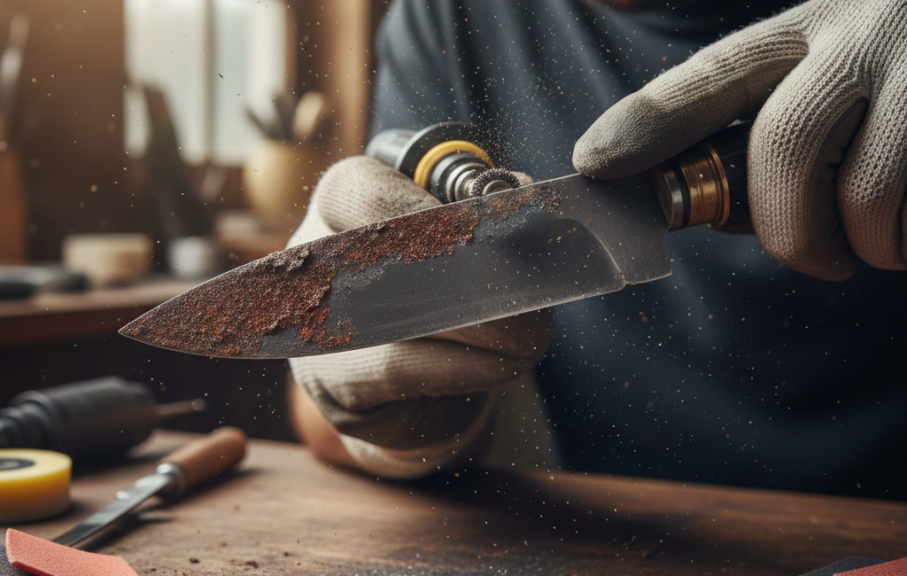
Phase 2: Mechanical Sanding (Removing the Pits)
Since pitting is a physical indent, you must “level” the surrounding steel to make the surface smooth again or use sandpaper to scrub inside the holes.
The Grit Progression: Use Wet/Dry Sandpaper.
320–400 Grit: Start here. Wrap the sandpaper around a small wooden block or a wine cork. Sand the pitted areas in the direction of the blade’s grain.
600–800 Grit: Once the deep orange color is gone from the pits, switch to this grit to smooth out the scratches from the previous step.
1000+ Grit: Use this if you want to restore the original “mirror” or “satin” shine.
Technique: Keep the sandpaper wet with water or a little bit of mineral oil. This prevents the sandpaper from clogging and creates a smoother finish.
Phase 3: The Edge and Safety Check
Pitting near the cutting edge is the most dangerous because it creates “micro-chips” that can break off into your food.
Grind the Edge: If pits are on the very edge of the blade, you must sharpen the knife using a coarse whetstone (400 grit) to grind the metal down past the depth of the pits.
Structural Integrity: If a pit is so deep that it goes nearly through the blade, the knife may be structurally compromised and could snap under pressure. If you see a “hole” through the steel, it is time to retire the knife.
After Rust Removal: Protect the Blade
Removing rust is only half the job—prevention is crucial.
Essential Post-Cleaning Steps:
Dry the knife completely
Apply food-safe oil
Store in a dry, ventilated area
Tip: Oiling after rust removal seals the blade and prevents future corrosion.